|
NX Concepts & Terms |
Capture NX: Capture NX is Nikon's premier NEF/RAW photo editor.
If you have a Nikon digital camera capable of producing NEF/RAW files,
then Capture NX is for you!
|
TIP: Most of Nikon's DSLR's allow you to save both a JPEG and
a NEF when a photo is taken -- so you get the best of both worlds. If the
JPEG looks great, you are done. Otherwise tweak the NEF in Capture NX!
|
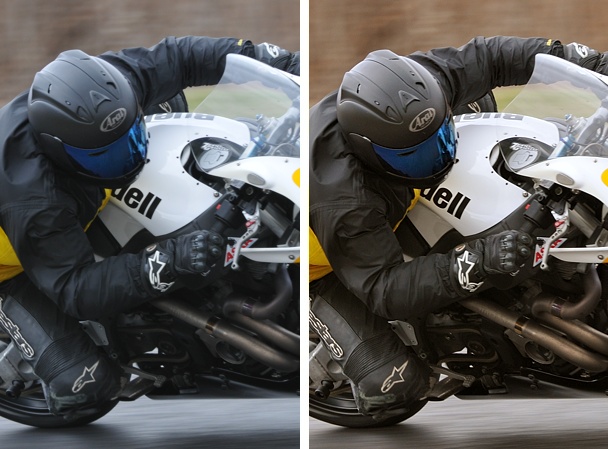
Adjust camera settings after the fact:
With Capture NX, you can quickly and easily adjust and
correct camera settings after the fact. Fix Underexposure. Fix
overexposure. Correct for camera tilt. Sharpen photos.
Correct white balance (color tint). Reduce Noise. And many other
Adjustments.
Make dull photos POP (details):
NEF: NEF stands for 'Nikon Electronic Image Format', which
is Nikon's RAW photo format. A NEF records camera settings and
the raw camera sensor information in a single file for later processing.
Advanced NEF Info
Undo capability: Any change that you make to a NEF is reversible,
even years later. So a NEF is your 'proof copy' of the photo. Whenever
you need a JPEG, you can 'Save As...' a JPEG, either as a last step,
or as part of a batch process on several NEF at once.
|
TIP: If you need to edit a JPEG or TIFF, you can, but save
your edits to a NEF, so there is a record of the edits, which can be
undone, as needed.
|
Batch Processing: Batch processing allows you to make the
same change to any number of NEF's at the same time.
Fix problems after the fact: What do you do when you take a picture
with automatic white balance that is horribly wrong? Easy to fix in Capture NX:
 If NX101.com helps you, help this site by making a donation.
|