|
Sharpening |
What is sharpening?: Sharpening increases to the contrast of edges,
creating the appearance of a sharper image. It should always be
the last step (after resizing).
Sharpening Methods:
There are three main methods of sharpening in Capture NX:
- Picture Controls Slider ('Develop' / 'Camera Settings' / 'Picture Control')
- High Pass ('Adjust'/'Focus' menu)
- Unsharp Mask ('Adjust'/'Focus' menu)
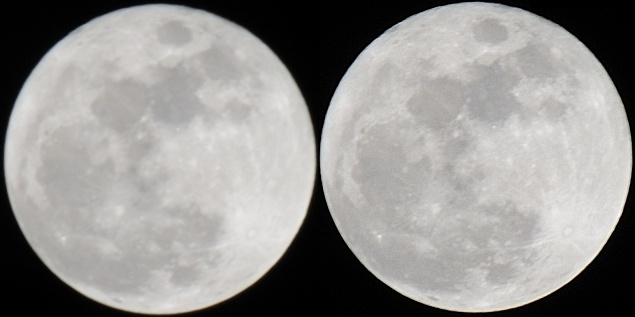 |
| Before and After -- Sharpening |
TIP: Zoom 100%: Make sure to always zoom in to your photo 100%
before adjusting sharpening -- to that you can clearly see the effects
of your sharpening.
Warning:
The entire goal of sharpening is to create a sharpening effect, not
to actually add noticeable halos to your photo. Play around to get
familiar with your sharpening tools, but also, use caution. Also, note
that sharpening may also sharpen 'noise' in your photo, making it more
visible.
High ISO Warning: Noise in a high ISO photo will look like an
edge to sharpening algorithms -- and if sharpened, will bring out the
noise even more. Use extreme caution when sharpening high ISO photos
as you can do more harm than good.
|
1. Picture Controls Slider
|
|
The sharpening slider can be found in 'Develop' / 'Camera Settings' / 'Picture Control'
in the Advanced section, which is great for sharpening the out-of-camera JPEG.
However, if you are going to post-process a photo, turn sharpening OFF under
picture controls (which is a first step). Instead, perform sharpening as
a last step (see methods below), after all of your other adjustments
to your photo.
USM: The 'Unsharp Mask' is a strangely named feature, which results
in a sharper image (not an 'unsharp' one). It is named after how it works
internally (it uses an 'unsharp mask'), not for what it does.
Intensity: How much contrast to introduce at an edge.
Radius: Halo width. When an 'edge' is detected,
how large to make that edge.
Threshold: How far apart tonal values need to be in order to
considered an edge. To protect smooth areas with fine tonal detail
(like a face), increase the threshold -- but this will also decrease
sharpening everywhere.
Remember, you can also use an Adjustment's
Selection area to sharpen just a small
area of your photo -- or sharpen an entire photo minus an area or two.
High Pass:
High Pass produces a neutral gray result, with only 'edges' remaining.
It must be used with Opacity (within the step in the Edit List) to create
the sharpening effect.
Radius: Controls the size of the edge produced.
Opacity: Set Opacity in the step to:
- "Luminance and Chrominance" mode
- 'Overlay' Blending Mode
- Chrominance set to 0%
 If NX101.com helps you, help this site by making a donation.
|